Discover how to make your materials more realistic with surface decals in Lumion.
In the real life and digital world, the smallest details do matter. The more details, the more your clients will feel like they are visiting the real thing. Surface decals is a new feature in Lumion 12. It will help you to achieve that result by adding wall art, murals, patterns, scratches, markings, signage, or even damage and imperfections.
In this post, Chip Render will show you how to make realistic materials with surface decals in Lumion.
1. Lumion surface decals
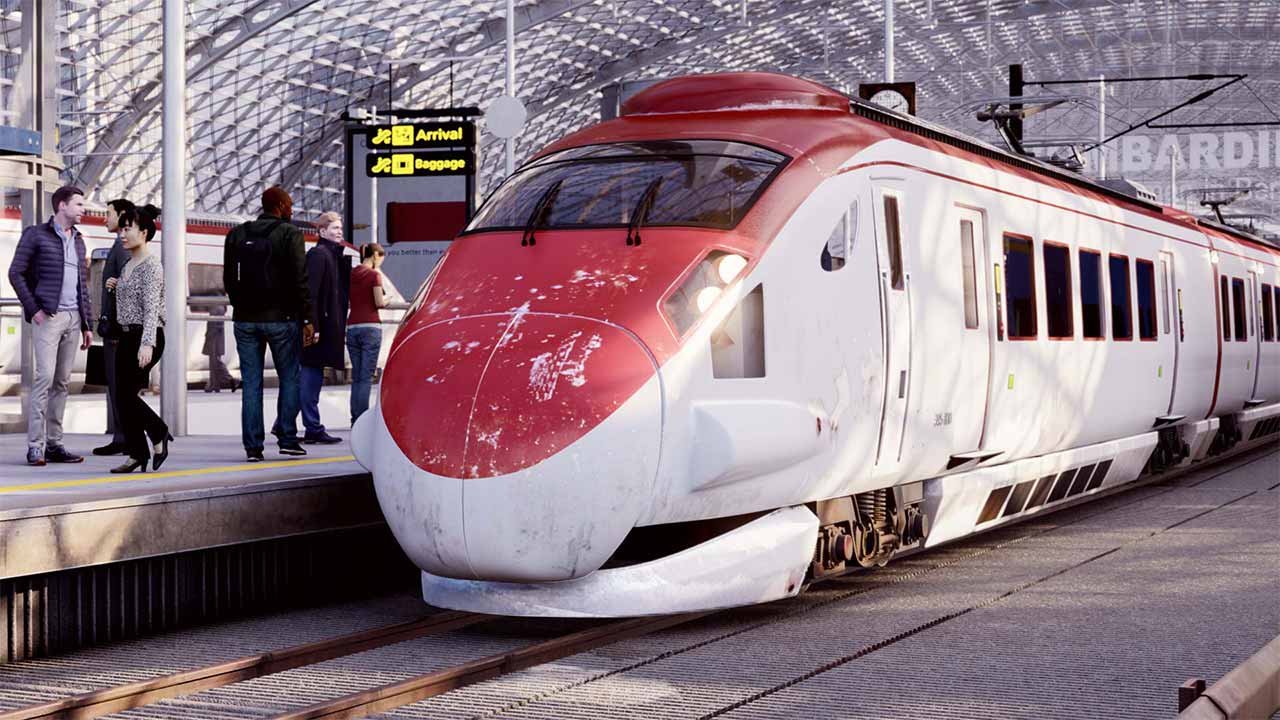
Decals on the train, image by Lumion.
Surface decals is a brand-new feature coming up with Lumion 12. However, it is only available in Lumion Pro. There are 142 surface decals in the Lumion Pro content library. Below are collections of decals:
|
|
Do you know what’s more? You are able to make your own decals and place them on any surface in your project.
2. Add surface decals in Lumion
Go to “Effects” in “Place” mode. Decals is the last subcategory. Click it, you will see several types of surface decals. They are grouped in collections. You can also check the collections in the previous session.
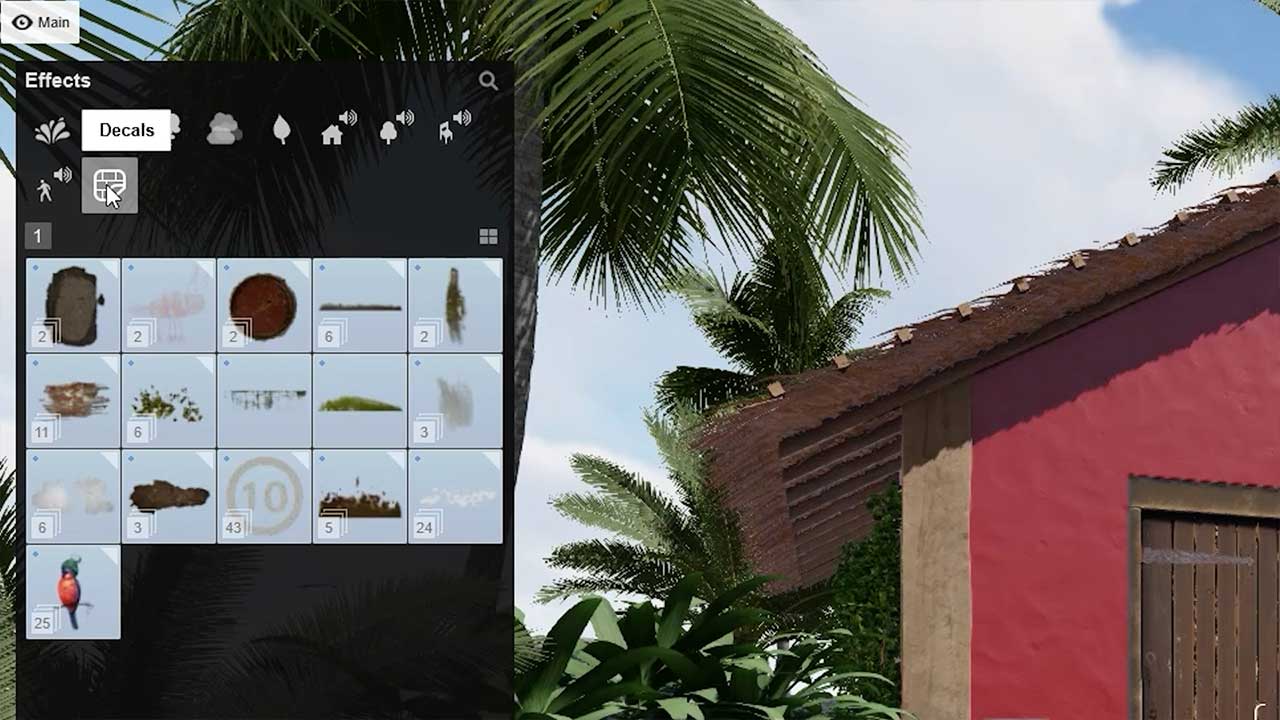
Decals location, image by Lumion.
Choose one decal you like and project it on any surface. The surface can be a wall, road, furniture, etc. You can make changes to the decal like any object in Lumion, including size, color, transparency, range, orientation, and more.
By that, you easily add a more natural look to your design.
3. Import custom surface decals into Lumion
Even though 142 ready-to-use surface decals in the Lumion content library are quite many and can be used for several purposes, there are times you could not find a suitable one. Because you want a special and customized decal. In this case, from Lumion 12.3, you easily import an image and let Lumion turn that image into a custom decal for you. After that, the custom decal will be applied and modified like other objects.
Go to Effects > Decals. Select Custom decal (Lumion logo) and place it on a surface. Next is to replace that Lumion logo with the image you want to show on the surface. Once placed, open the decal’s property settings and click on ‘Show more.’
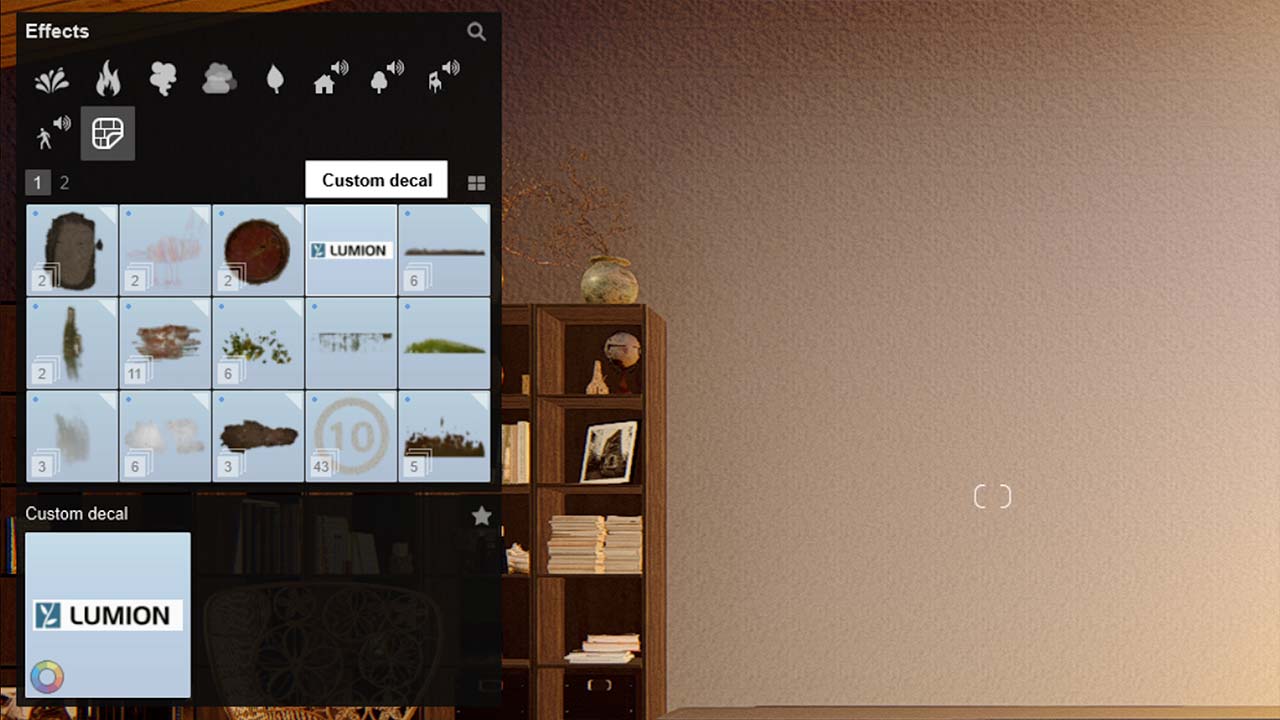
Custom decal location, image by Lumion.
Click the square button right next to the Blend colors slider and choose an image to add. The image will be imported and turned into a decal. Next, configure it like surface decals. Don’t forget to adjust the scale and blend with the surface behind it for a more realistic look.
Wrap up
All the above are about Surface decals in Lumion 12, and how to make realistic materials with surface decals in Lumion. With this new feature, you capture all the character, imperfection, and beauty found in real-world materials with ease.
Like many other GPU render engines, Lumion needs powerful hardware to run smoothly. If your computer is average or barely meets Lumion’s minimum requirements, Chip Render Farm is an ideal solution to significantly reduce the render time and accelerate your workflow.
 If your computer is average or barely meets Lumion’s minimum requirements, join Chip Render Cloud Workstation and cut your render times several times with just a small investment from $2.9. Sign up now and leverage 1/2/4 x GPU RTX 3090 servers – powerful and affordable GPU rendering solutions for Lumion.

