QUICK START
Chip Render Farm is a friendly and efficient CPU & GPU cloud rendering solution for all 3D artists. Whether you are a student, a freelancer, or a creative studio, you can leverage our cutting-edge technology and hardware to make your deadline at a low cost.
Chip Render is an IaaS (Infrastructure as a Service) render farm. We support all 3D applications and plugins, which are ideal for real-time rendering software such as Unreal Engine, Lumion, Twinmotion, and more. The best part is that our IaaS model gives you complete control over the servers and your workflow rather than SaaS solutions.
Easy of use, fast rendering, affordable prices, dedicated support, and especially full control – we give artists all they need to meet their on-demand rendering.
How to register and use our service?

1. INSTALL & REGISTER
Download and install Chip Render App.
Then create an account with us, and verify it via the link we will send to your email address.
2. TRANSFER FILES
You can transfer files to and from the server using our Chip Render App or third party cloud drives, FTP services (i.e. Dropbox, Google Drive, One Drive, WeTransfer). Files can be transfered even when the server is turned off.
3. CREATE MACHINE
In Chip Render App, create a new machine and select the server (1 / 2 / 4 x RTX 3090). This will create your first machine with Windows or Ubuntu OS. The machine will be saved and safely stored after each session.
4. CONNECT & SET UP
After booting up, you’ll connect to remote machine by a .rdp (Remote Desktop Connection) file and set up it as you wish. You can connect to many machines on one or multiple servers at a time.
5. USE REMOTE SERVER
Use the remote machine as you wish, you can use it for rendering, simulation or even modeling. When your work is completed, transfer your results and shut down the machine.
6. PAY AS YOU GO
Pay only for what you use after 1 hour commitment. The prices are $4.5, $6.5 or $12 per hour depending on your server choice. You can top up your account via PayPal, OnePay, or bank transfer.
Step 1. Install & Register
Download and install the Chip Render App here.
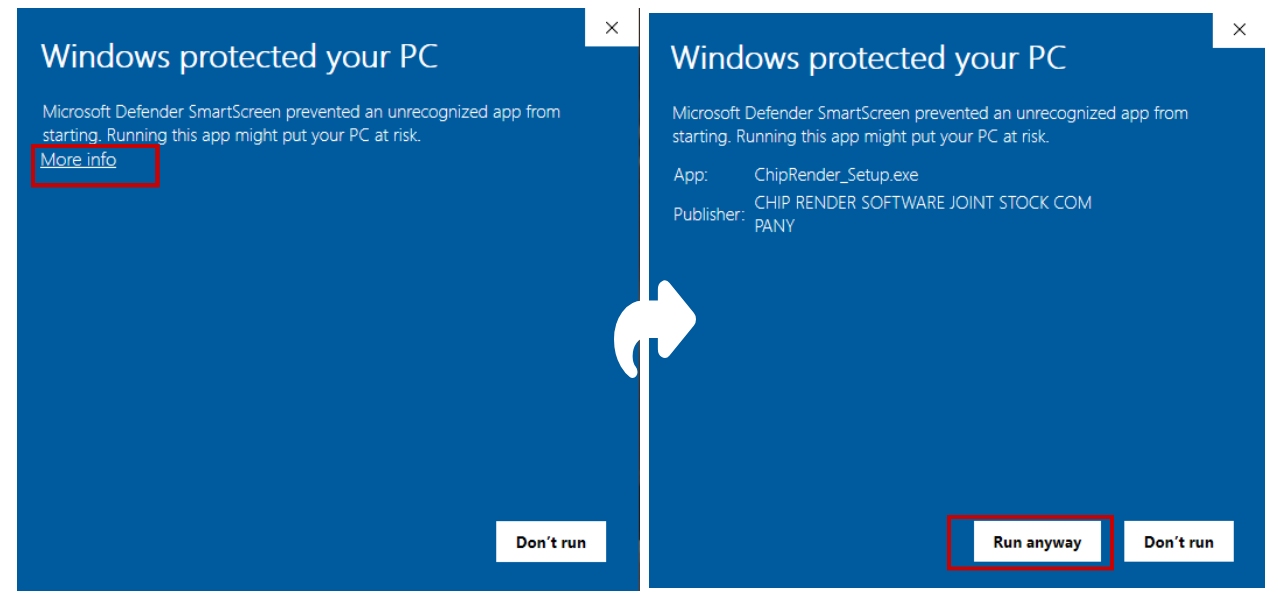
* Note: When installing the Chip Render App, you may encounter a warning like the image below. Proceed with the installation by clicking on More info » Run anyway.
Then create an account with us, and verify it via the link we will send to your email address. If you don’t receive the “Active your Chip Render Account” email in your Inbox, make sure to check your “Spam” as well.

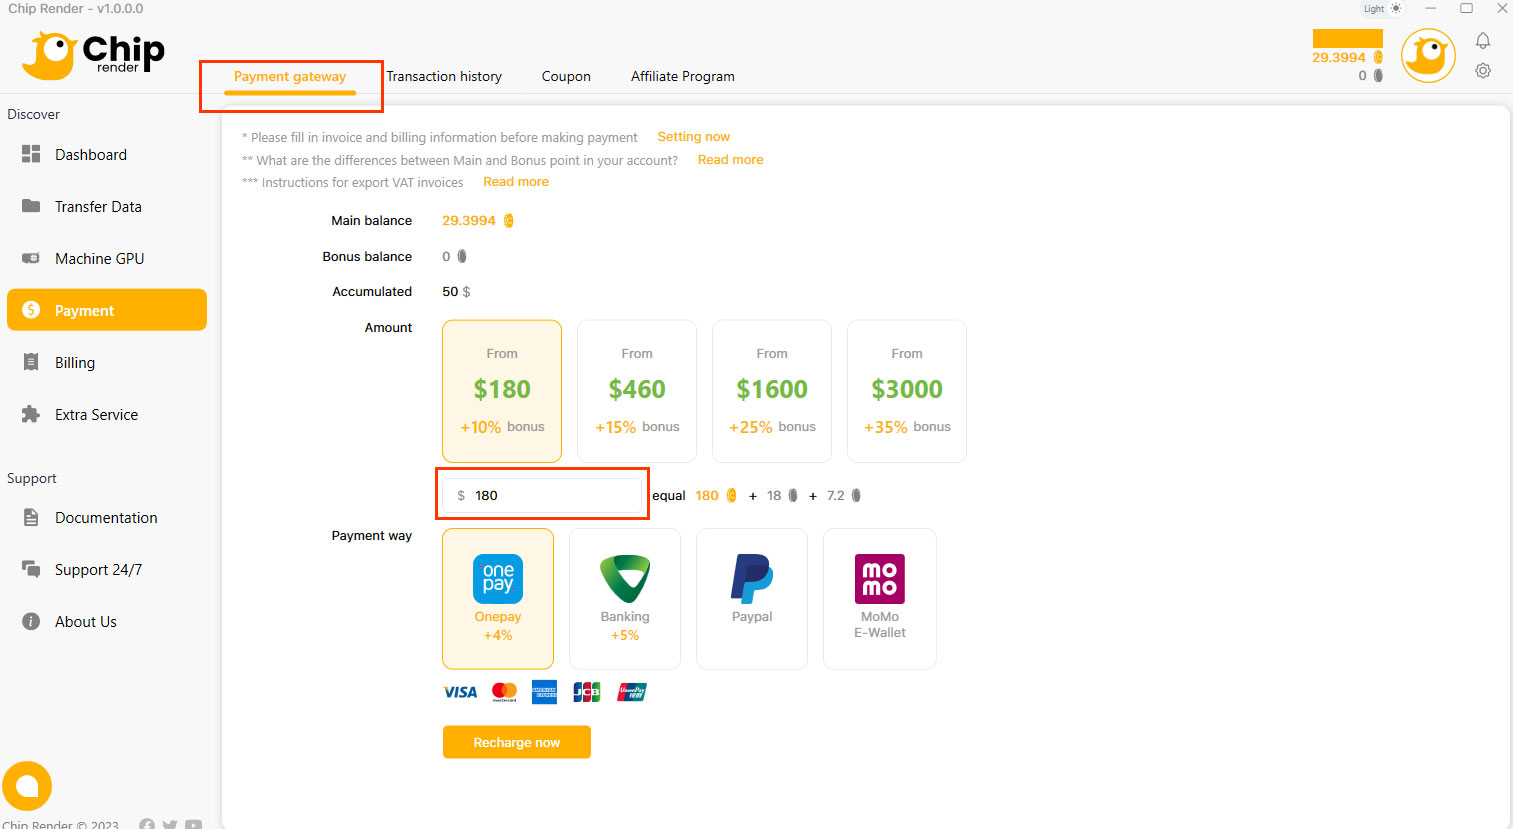
Step 2. Purchase Chip Points
Log into your Chip Render account and go to Payment > Payment gateway. You can top up your account via Paypal, Onepay, Momo, and Bank Transfer.
- You can pay via Paypal and Onepay payment gateways with VISA, Mastercard, American Express, etc.
- Momo is more convenient for Vietnamese users.
- You can also pay via direct bank transfer.
(Note that the minimum top-up is $50.)
Step 3. Transfer files
To save time and money, transfer your project files from your computer to our remote server before starting the server.
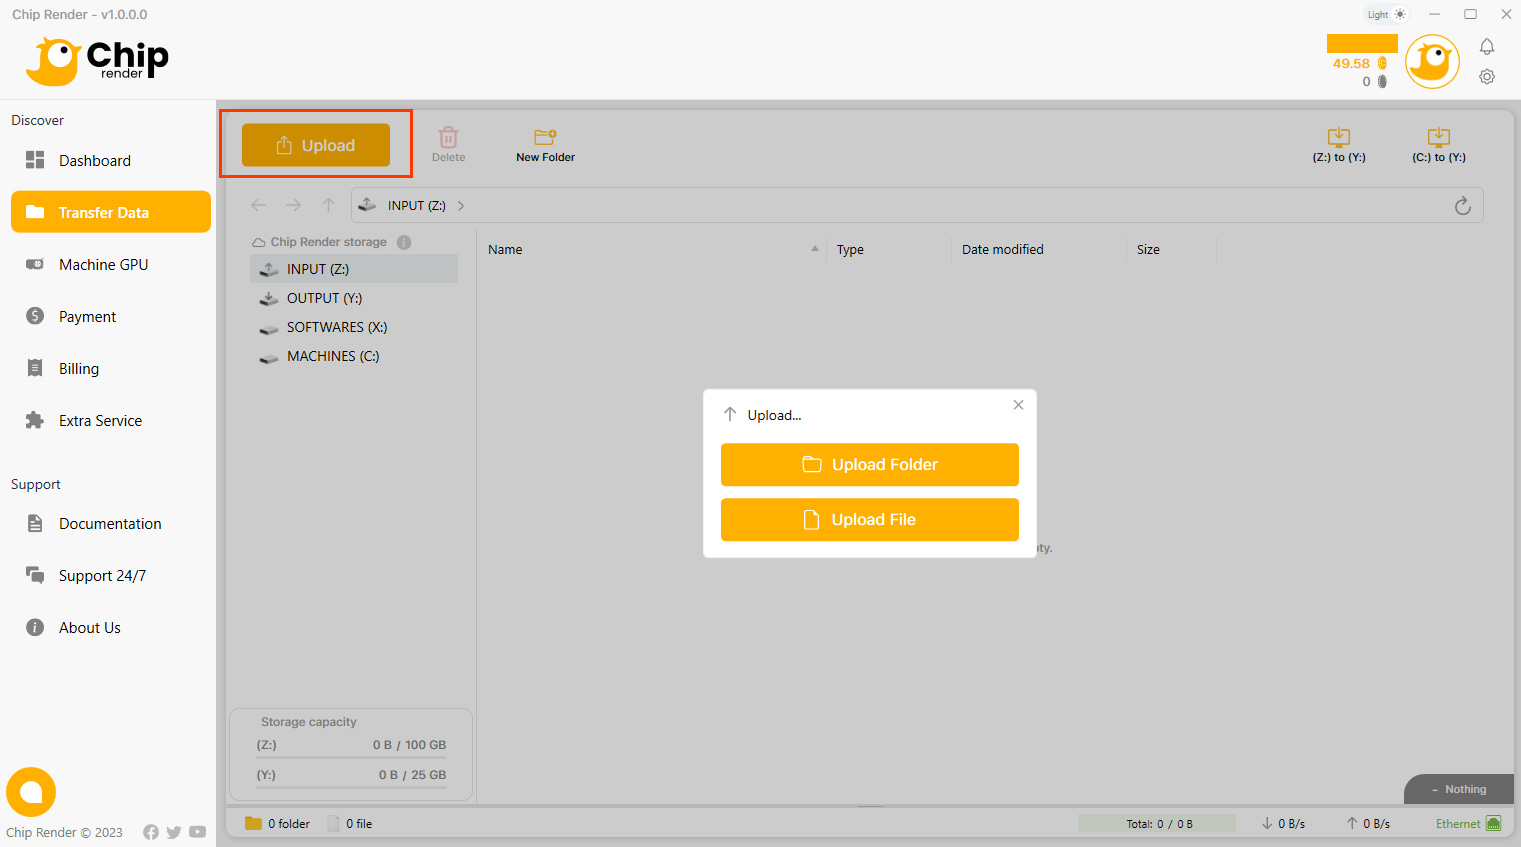
- Go to the Transfer Data tab.
- Select INPUT (Z:) » Upload your files (project files, assets, texture, etc) necessary for the render and software installer (if any) by choosing Upload.
Note: We put some installers of common software in an (X:) drive (Read-only) for fast installation time. When connected to our server, copy it from the X drive to C/Desktop and install it. Using different software or versions, you can also upload its installer and your project files to the Z: drive. It will be on our remote servers, and you can install your software faster. The table below shows the Chip Render App storage to upload your project files (input) and rendered result files (output). You don’t have to pay for this storage, it’s given to you for free to use based on the total recharge amount you have deposited to your Chip Render account. The more total recharge amount, the more storage you will get.
If you need more, don’t hesitate to contact us.
Step 4. Create a new Machine
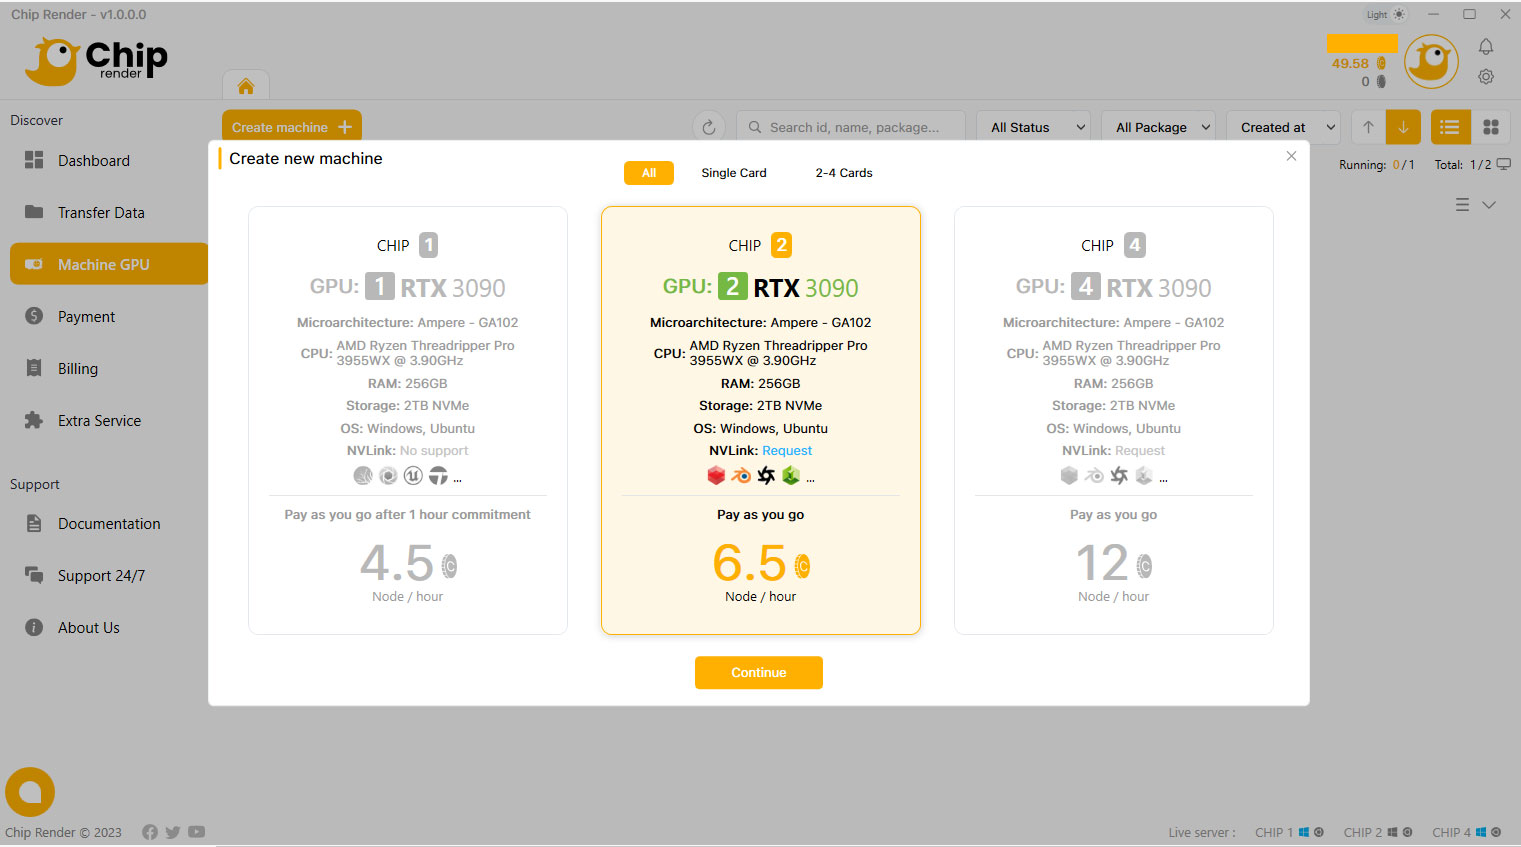
The machine in the Machine GPU section stores your working environment (installed software and saved data) in our cloud system. Chip Render provides single to multiple GPU servers. Depending on your demand regarding the purpose of 3D rendering or AI training, the use of software & plugins, and the project scale, you should choose the suitable server package.
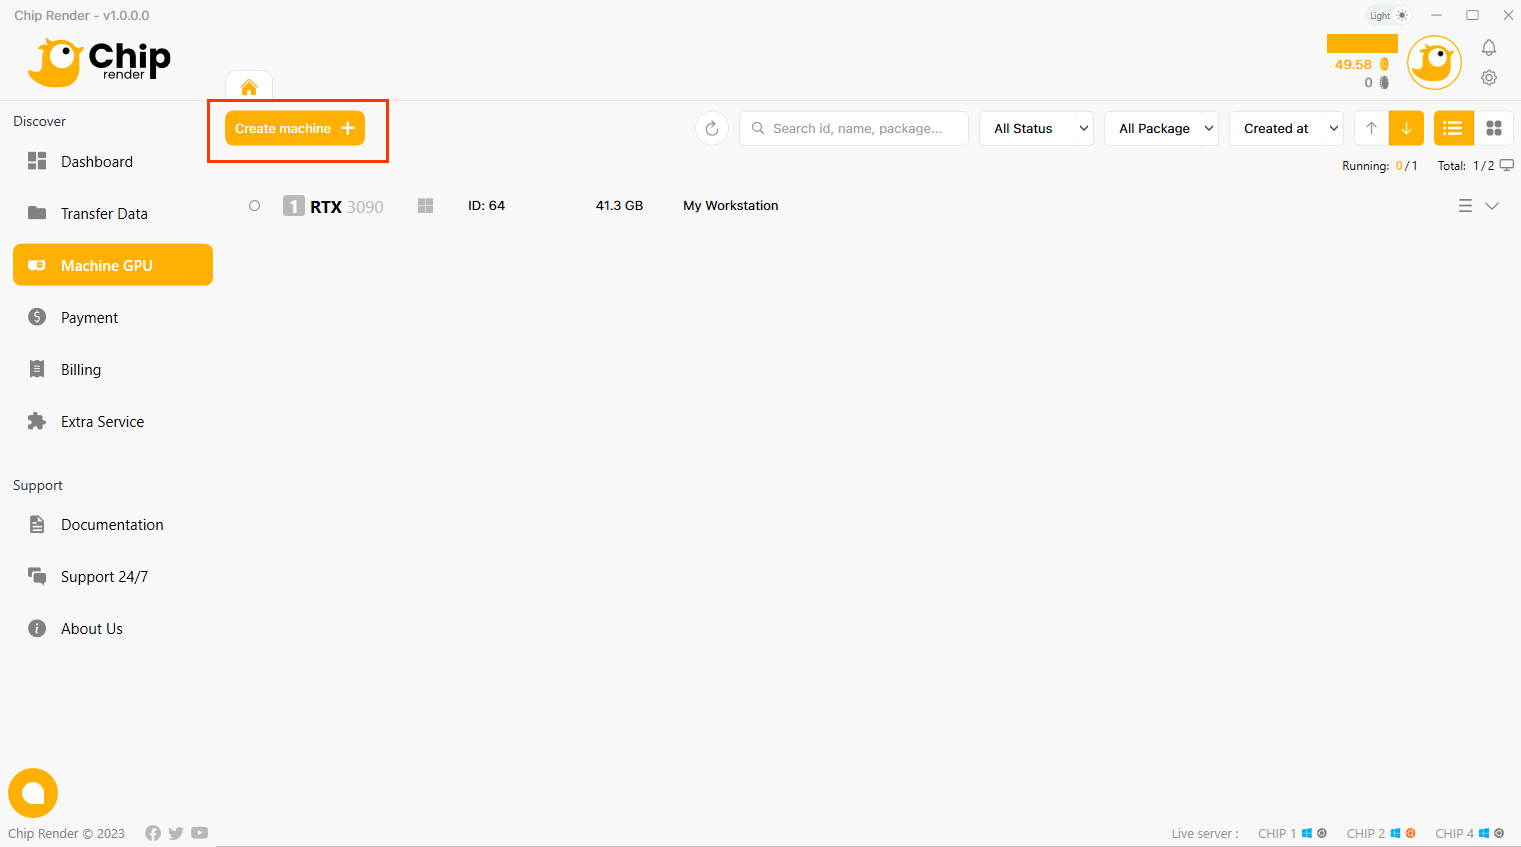
1. Go to Machine GPU section > Create machine.
2. Select a configuration package you want to use and click the Continue button.
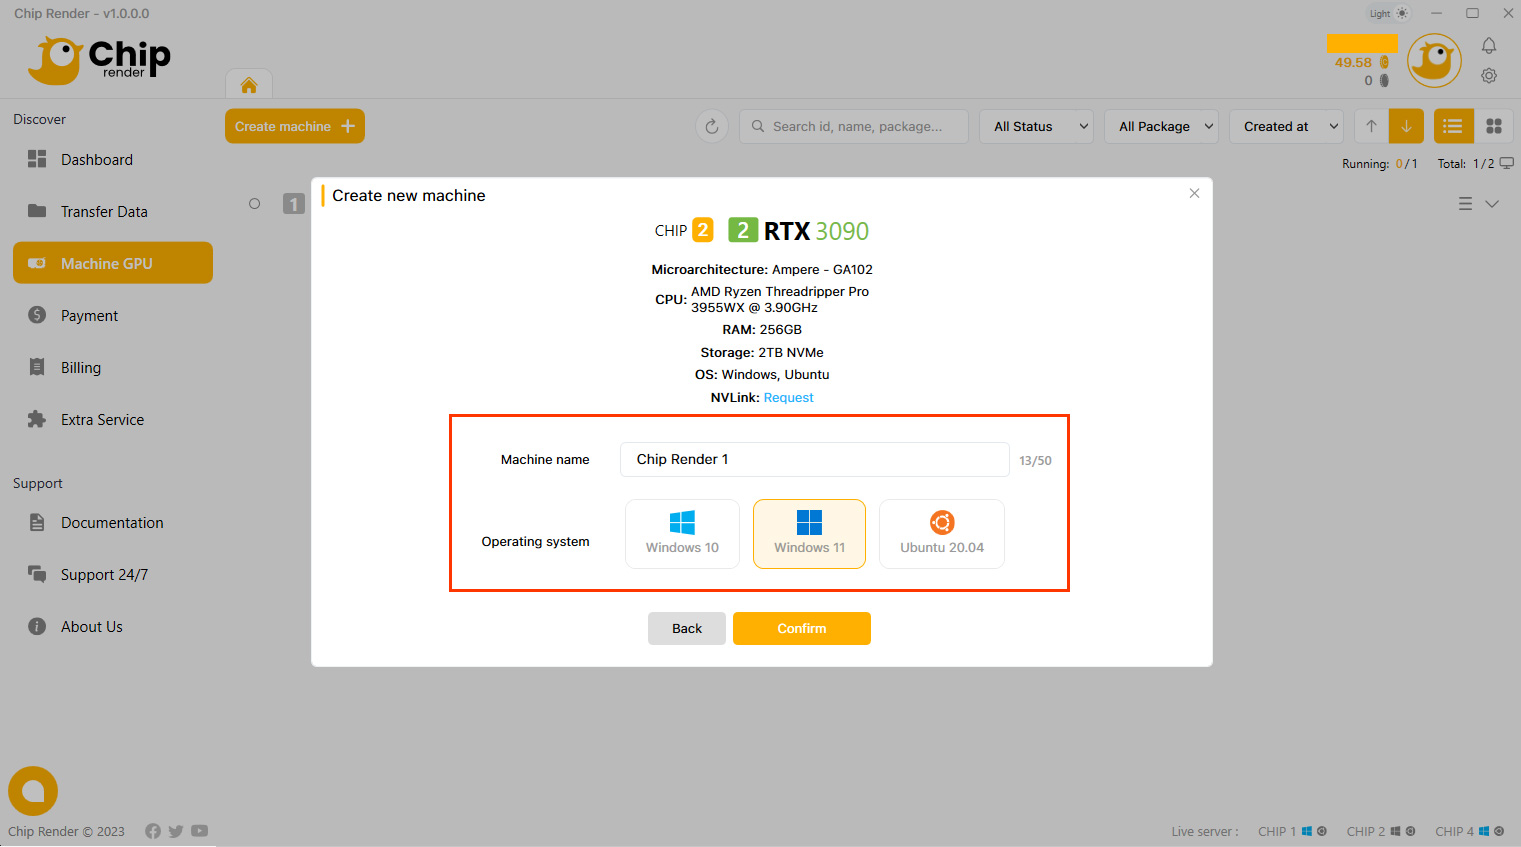
3. Name your machine, choose the OS type and click the Confirm button.
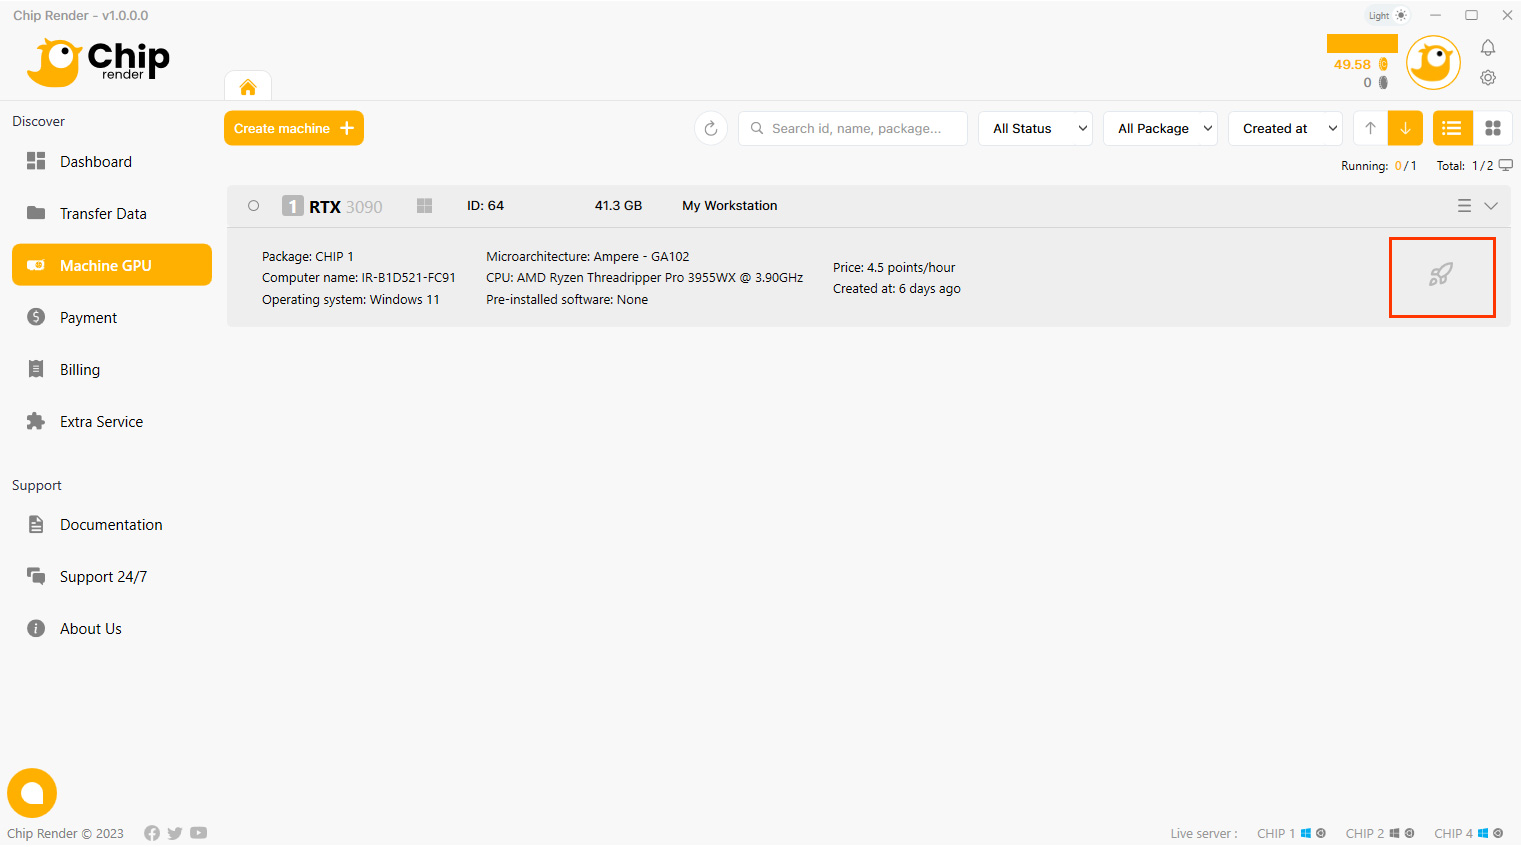
Step 5. Boot a machine
After creating a new machine, you click Boot.
Here we offer you:
- Pay as you go.
- Pay as you go after 01 first hour (This option is specific to CHIP 1 package).
Usually, booting a machine takes about 10-15 minutes. This booting time relies on your machine size, and everything you have on our server, including installed software, saved data, etc. The more the size, the more time it will take to start.
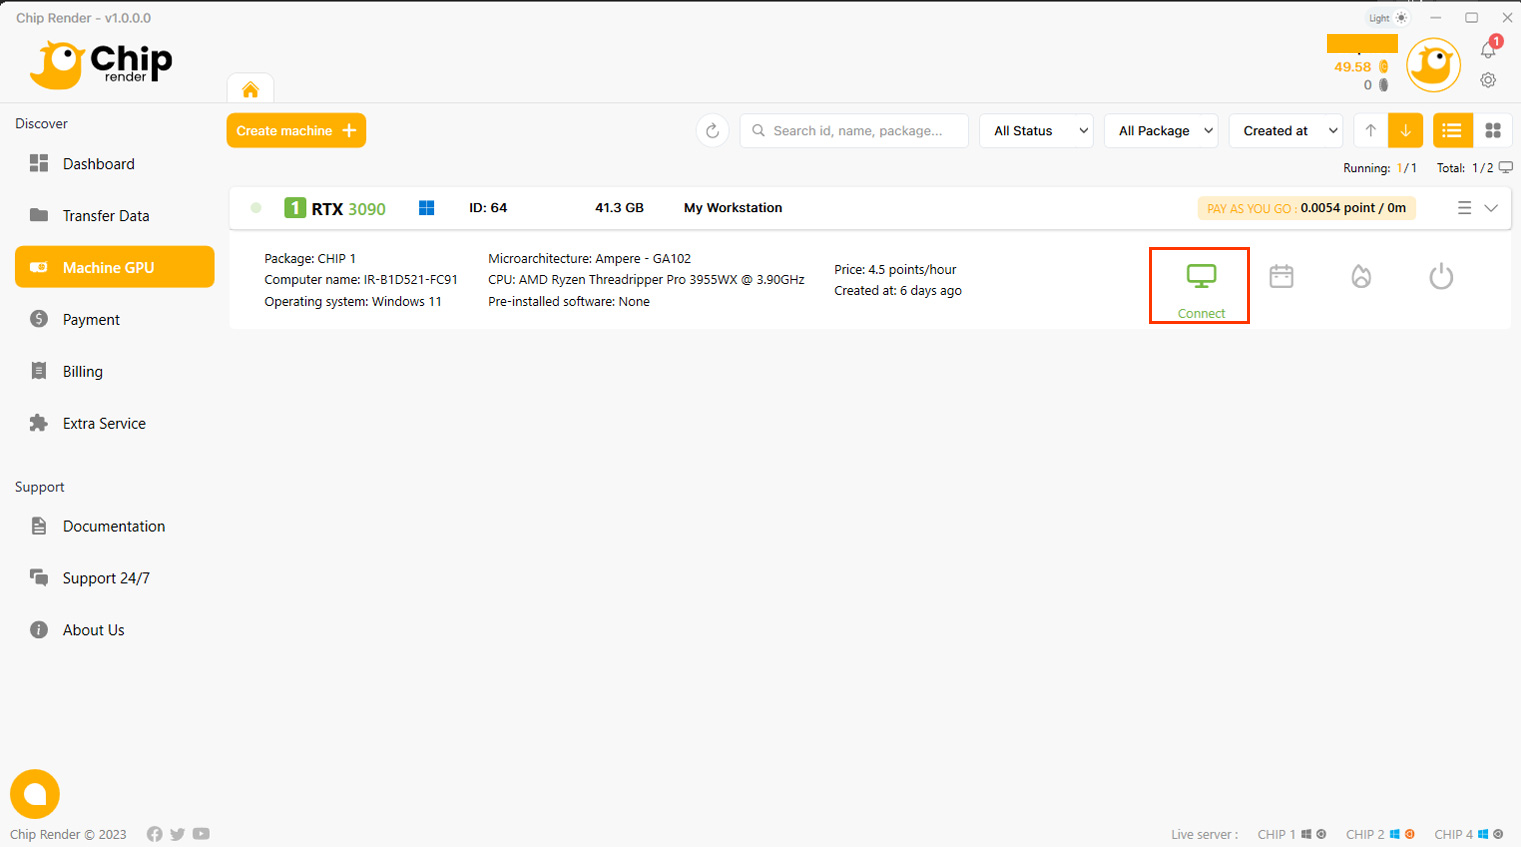
Step 6. Connect to the remote machine
After your machine is booted successfully, your user interface will appear with a CONNECT icon (our system starts charging you from this step).
You should click CONNECT to connect to our remote server immediately.
This is the screen display after you click the Connect icon, the most potent gateway will always appear as default. A tip for you to automatically connect to the best gateway by go to the setting icon beside your avatar and check to check box “Automatically connect to the best remote desktop gateway.”
Here you are! You’re on our remote server! You will take complete control of it, using it is the same as using your PC. As we suggest, you can install any software you want on this remote server and install it ONLY ONCE. Your working environment will be saved after each session of use. Therefore, you won’t have to re-install anything the next time you use it.
Now, set up your working environment (installing software and transferring your licenses) and start rendering.
All the uploaded files to our Chip Render App will be on the (Z:) drive. However, Z is just a network/virtual drive for transferring files. Working directly on this drive can cause problems. Therefore, you will have to copy all of the files to the hard drive (Desktop/C:), then do everything (installing software, opening project files, saving output, and rendering) for stable rendering and avoiding network-related issues.
Tips: To ensure your software license is safe, deactivate your license key when you finish rendering and stop using our server.
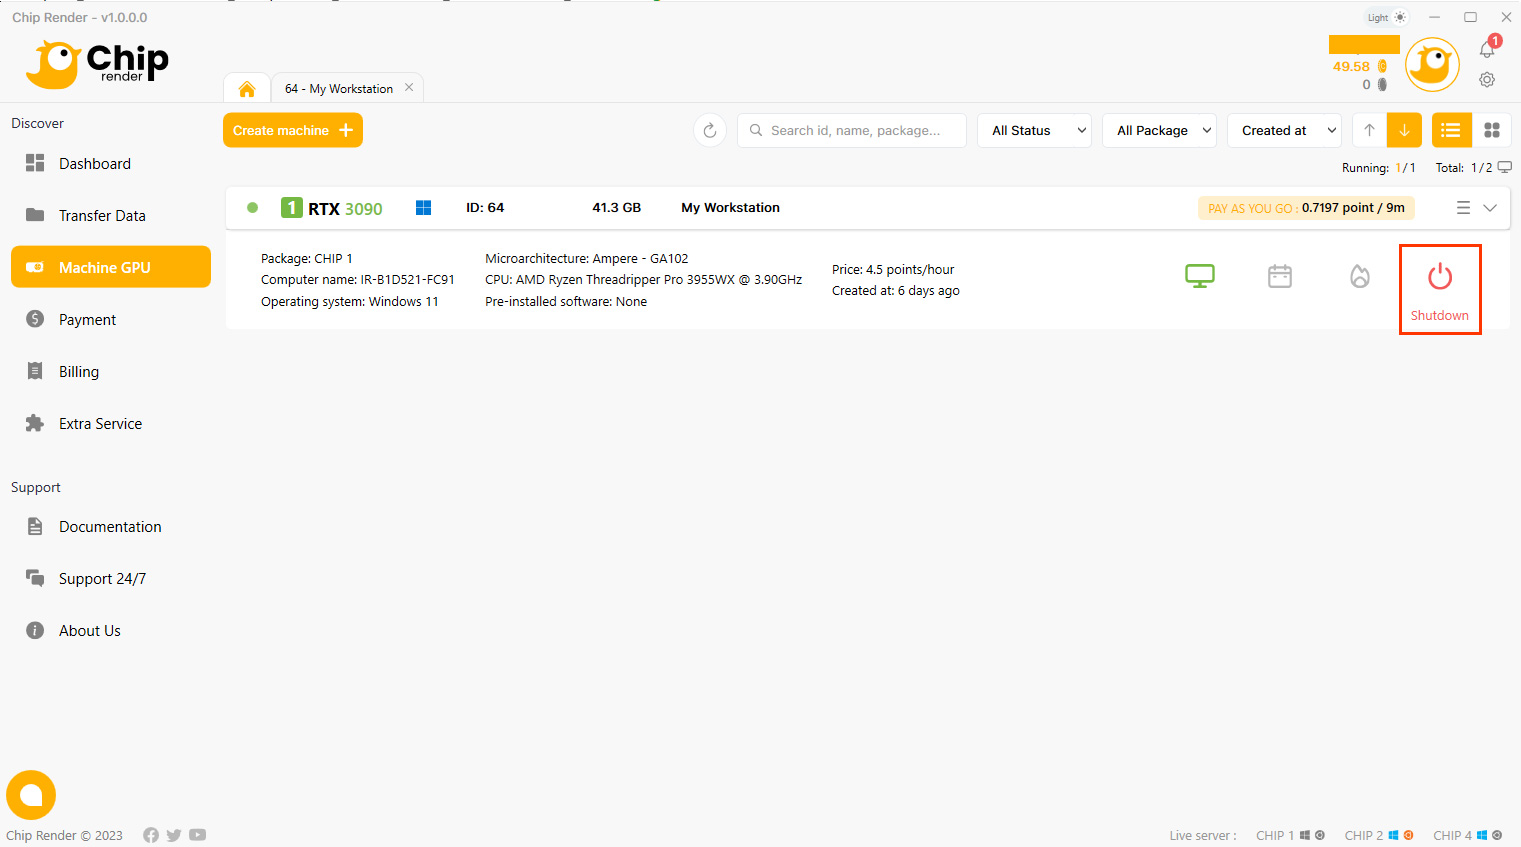
Step 7. Shut down the machine
After rendering on the server, move your result files from C: drive/Desktop to the OUTPUT (Y:) drive. These files will be synced to the Y drive in the Transfer Data tab.
After that, you must press the red Shutdown button on the machine to stop our system from charging. If you want to shut down your remote server at a specific time, click the “Scheduler” to schedule the shutdown time. Important note: Our system stops charging you only when you press this red “Shutdown” button.
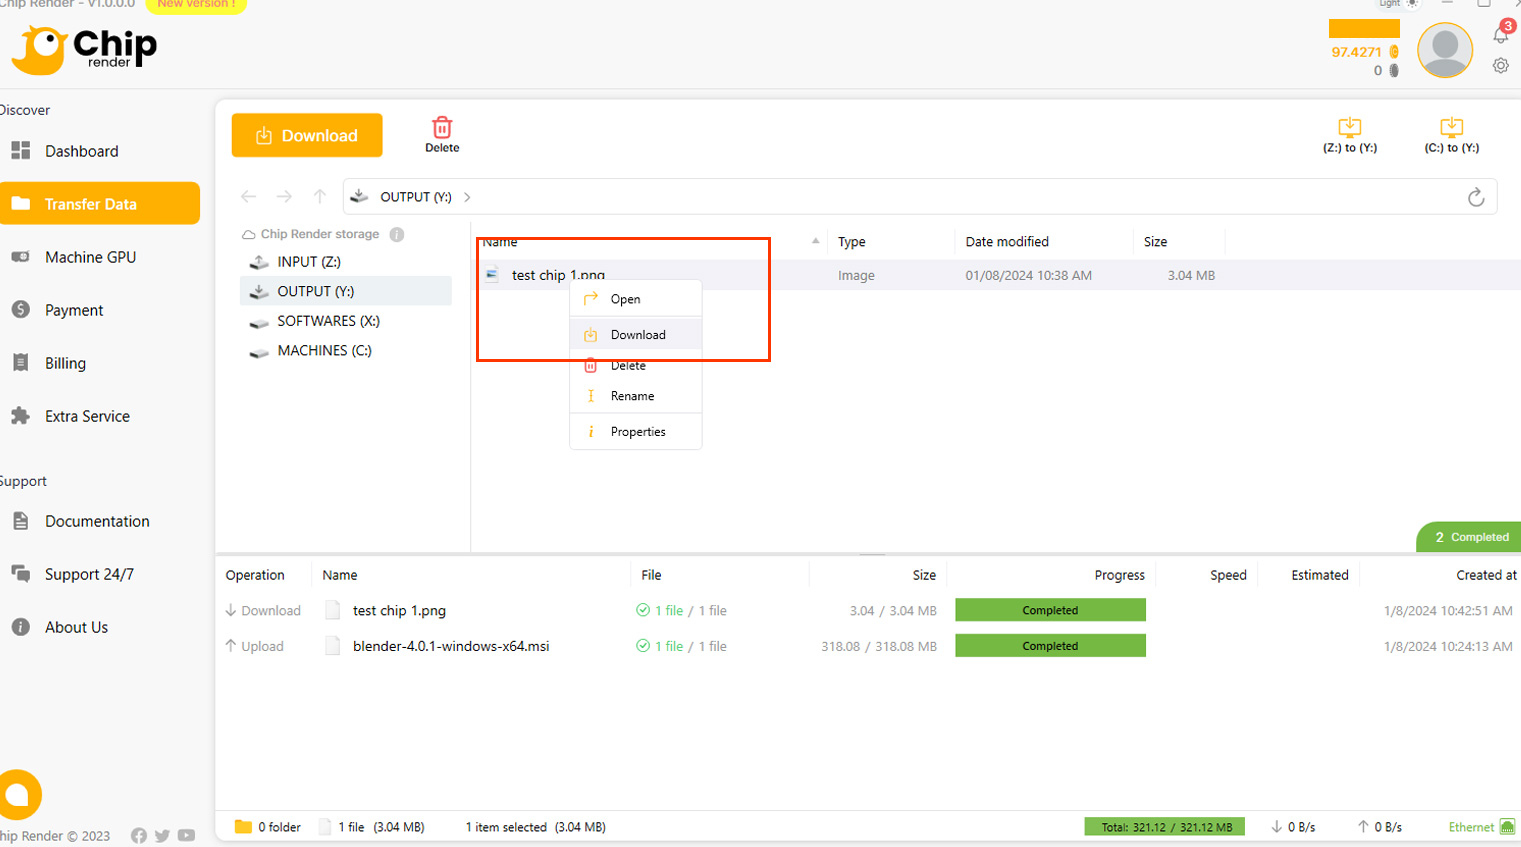
Step 8. Get the render result
Choose the Transfer Data tab and download the result files from the OUTPUT (Y:) drive.
Note that the storage capacity of the OUTPUT (Y:) drive is one-quarter of that of the INPUT (Z:) drive.

"We bring you the power of rendering, so you can get more time to enjoy your creativity!"
BLOG
The latest knowledge, projects and news about 3D, VFX and render farms.