
Discover Part 2 of “Redshift Rendering Tips: How to render faster in Redshift for Cinema 4D?”.
Continue previous Part 1, in this post, Chip Render will explore more useful Redshift Rendering Tips for rendering faster in Redshift in Cinema 4D.
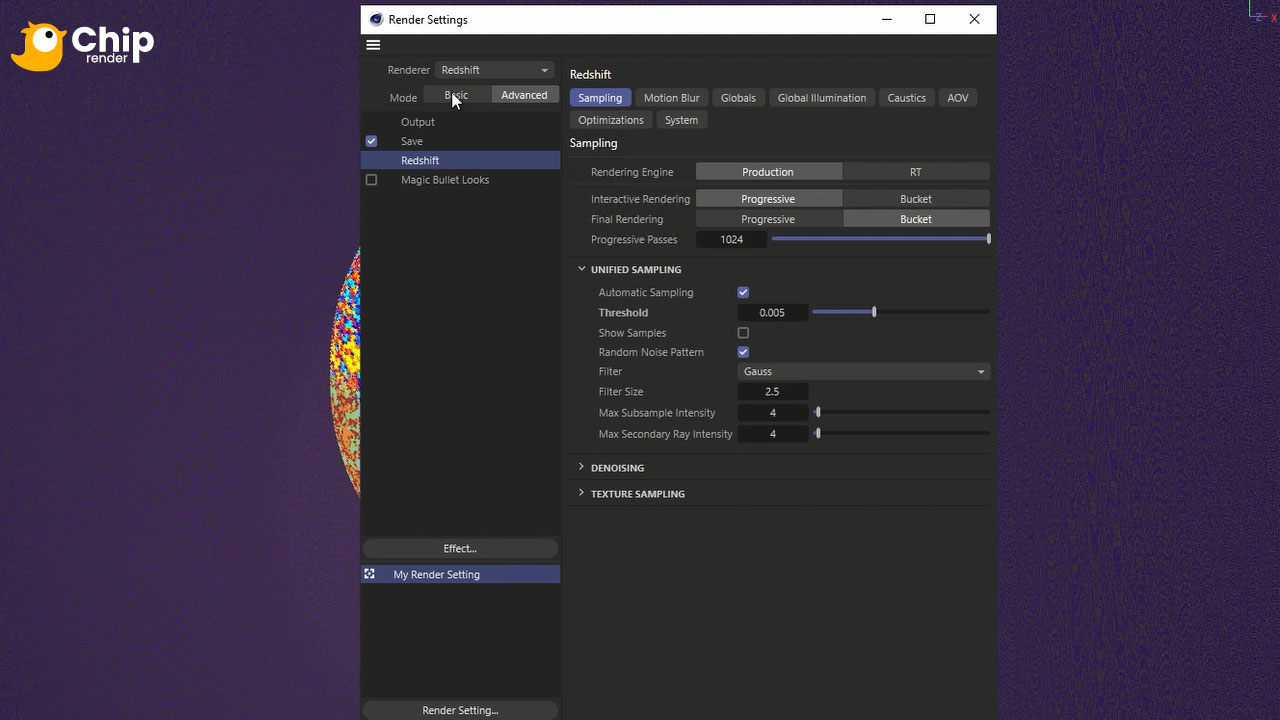
Redshift Rendering Tip 1: Use automatic sampling
Traditionally, achieving optimal render speeds involved intricate setups with overrides, where manual tweaking of sample values was a necessary chore. However, the Automatic Sampling algorithm emerges as a game-changing solution, effortlessly navigating the delicate balance between noise reduction and rendering time. By simply toggling this feature on, you empower Redshift to take charge, often delivering superior results with unparalleled efficiency. This invaluable tool allows you to bid farewell to the laborious process of manual adjustments, saving you substantial time and sparing you with unnecessary hassles.
Redshift Rendering Tip 2: Avoid Motion Blur, Caustics, and unnecessary AOVs
To speed up renders, you can consider using motion blur during post-production rather than directly in your render. Similarly, stay away from caustics, as these effects tend to be computationally intensive and can considerably slow down your rendering process.
Additionally, only rendering the essentials when creating AOVs for post-production work. Unnecessary AOVs can lead to prolonged render times.
Therefore, a wise approach involves rendering only what is indispensable for your specific project requirements. This wise choice not only streamlines your rendering process but also optimizes the overall efficiency of your Redshift workflow.
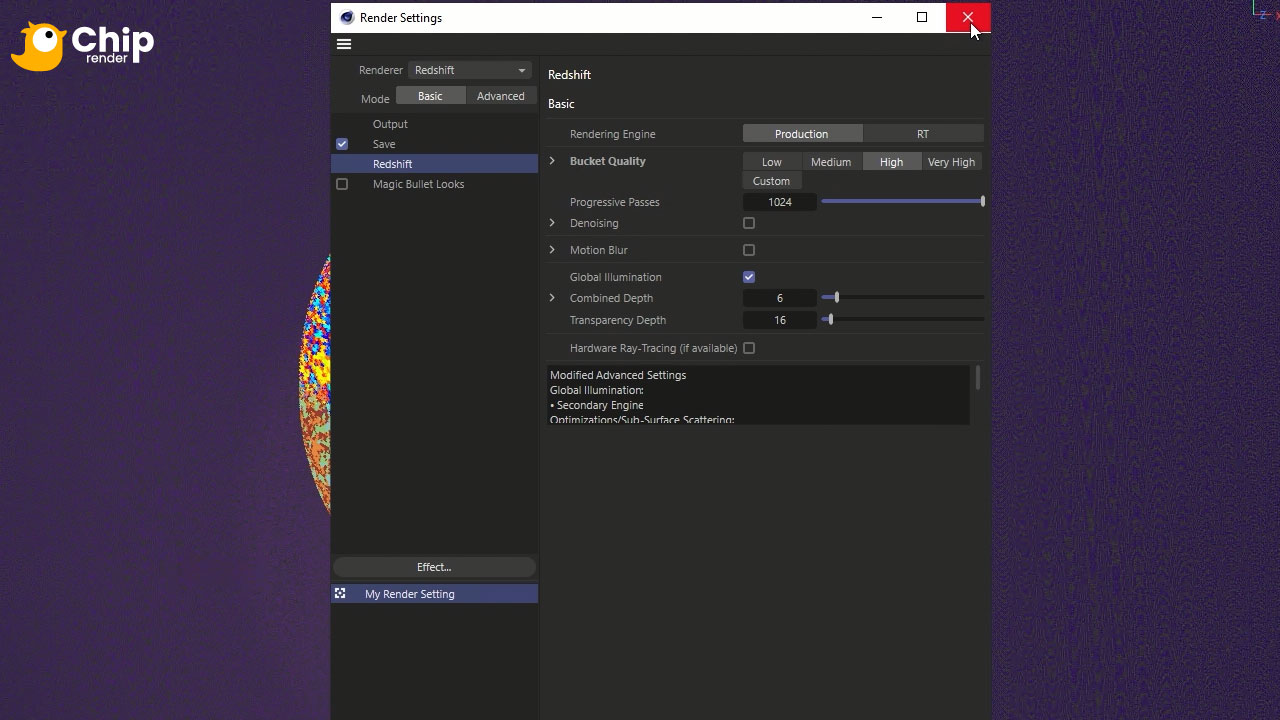
Redshift Rendering Tip 3: Enable Hardware Ray-Tracing
You can leverage the advanced capabilities of Nvidia RTX Graphics cards, like the RTX 3090 and RTX 4090, to optimize your Redshift rendering performance. Activating Hardware Ray-Tracing taps into the powerful hardware capabilities of your RTX Graphics card, enhancing the efficiency of ray-tracing processes.
Notably, this setting has no impact on the irradiance point cloud and irradiance cache GI. In such cases, it is recommended to utilize the Brute Force method for optimal results.
Redshift Rendering Tip 4: Reduce Trace Depth
The next tip is adjusting the Trace Depth values to control the number of bounces calculated for different ray types in Redshift. By decreasing these values, you can effectively limit the computational load, leading to a faster rendering process.
It is important to note that this adjustment may result in a slightly darker scene due to the reduced number of bounces. To further optimize, you can turn off unnecessary rays such as Volume and Transparency, and experiment with minimizing Reflective and Refractive bounces.
This approach allows you to tailor the trace depth settings to the specific requirements of your scene, striking a balance between rendering speed and scene brightness.
Redshift Rendering Tip 5: Use Cut-off Thresholds
You can speed up your renders by using Cut-Off-Thresholds in the Optimizations Tab. Increasing cut-off thresholds allows you to terminate rays sooner during the rendering process, which significantly improves speed, but at the cost of adding more noise into the image.
To reduce the noise, you can either increase the number of samples or use the denoising method. This tip offers a practical way to adapt your render settings based on your specific project requirements, achieving a balance between rendering speed and the desired level of image clarity.
Redshift Rendering Tip 6: Increase the Bucket Size
You can optimize your renders by adjusting the bucket size setting. A larger bucket size can contribute to faster renders. However, it requires more VRAM. Therefore, ensure that your graphics card can accommodate the chosen bucket size.
Maxon advises against using the smallest bucket size setting of 64 for GPU rendering, as it may fail to effectively use the GPU processor. Similarly, if you have multiple GPUs, refrain from selecting the largest bucket size of 512, as this can lead to similar inefficiencies. Striking the right balance in bucket size can significantly impact rendering speed while maximizing your hardware’s capabilities.
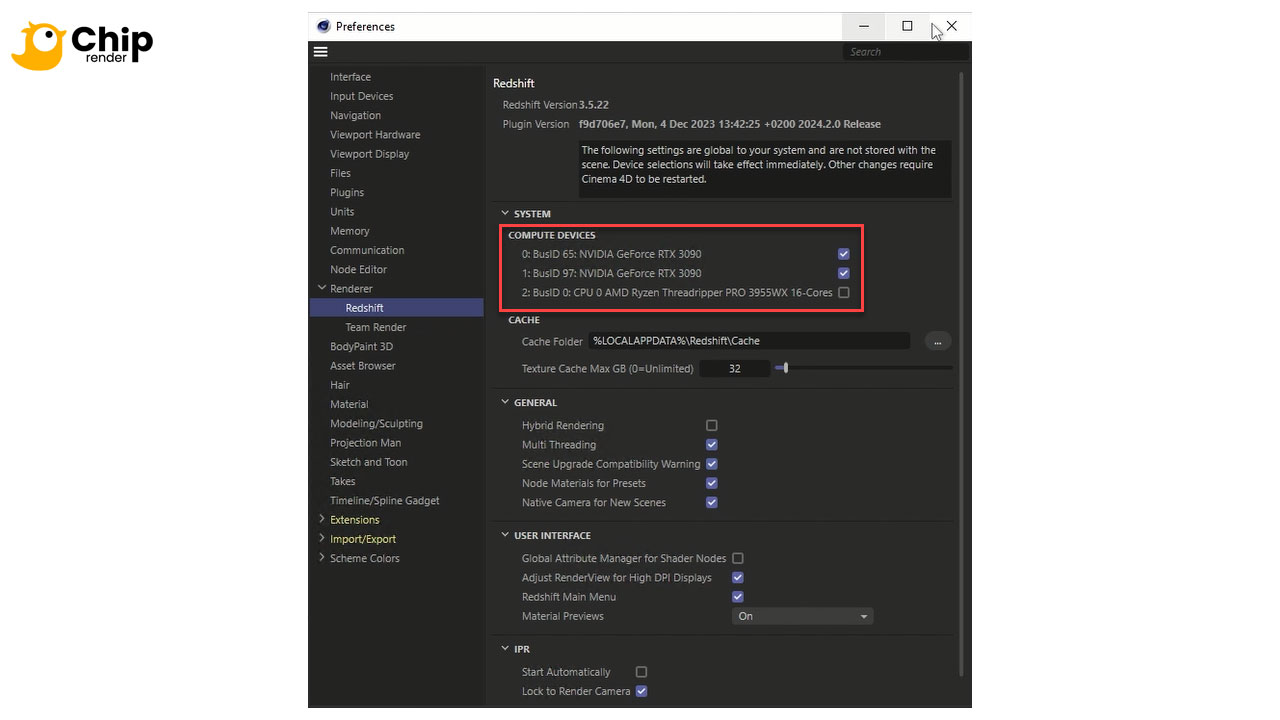
Redshift Rendering Tip 7: Optimize Your Redshift Preferences
To enhance your rendering speed, it is crucial to optimize your Redshift preferences. In the Preferences menu, selectively choose only your GPUs from the Devices list. Avoid using Hybrid Rendering, as sharing the load with your CPU can lead to a slowdown in renders. Additionally, deactivate Material Previews to further streamline your workflow, preventing unnecessary delays.
By customizing these settings to align with your GPU capabilities and rendering needs, you can ensure a more efficient and faster rendering process in Redshift for Cinema 4D.
Redshift Rendering Tip 8: Localize your textures from the Asset Database
Another tip for streamlining your Redshift rendering process is optimizing the localization of your textures, particularly if you are using materials from the Cinema 4D Asset Database. To enhance efficiency, relocate the textures to your local tex folder using the Project Asset Inspector.
This step is essential because Redshift may encounter challenges when working with files directly from a database. By localizing your textures, you can significantly improve the compatibility and performance of Redshift, ensuring a smoother rendering experience in Cinema 4D.
Extra Tip: Leverage Chip Render - a cloud render farm
Furthermore, optimizing Redshift rendering performance extends beyond local optimizations. A great approach is to employ a cloud render farm, such as Chip Render, to maximize the capability of cloud rendering.
Chip Render accelerates the rendering process, enabling you to distribute the computing strain to remote servers. This not only speeds up rendering times but also frees up your local workstation for other jobs.
With Chip Render’s user-friendly interface and support, you can effortlessly integrate cloud rendering into your workflow, resulting in faster and more effective Redshift rendering for your Cinema 4D projects.
 Join Chip Render Farm and cut your render times several times with just a small investment from $2.9. With Chip Render, you have your own Cloud Workstation and leverage 1/2/4 x GPU RTX 3090 servers for rendering Redshift projects.