
Discover Part 1 of “Redshift Rendering Tips: How to render faster in Redshift for Cinema 4D?”.
Redshift is a powerful GPU-accelerated renderer for Cinema 4D. If you want to supercharge your Redshift for Cinema 4D rendering experience, this post is for you.
Chip Render will explore a variety of tips that will elevate your Redshift rendering game in Cinema 4D. From optimizing your workflow to boosting rendering speed, and enhancing the overall efficiency of your projects.
Redshift Rendering Tip 1: Update Cinema 4D, Redshift, and GPU Drivers
Keeping your software and drivers up-to-date is the first step toward optimizing your rendering workflow in Redshift for Cinema 4D. Regularly updating Cinema 4D, the Redshift renderer, and your GPU drivers ensures that you are benefiting from the latest enhancements, bug fixes, and performance optimizations.
The developers continually refine and optimize these tools to enhance compatibility with the latest hardware and software advancements. By staying current with updates, you not only unlock new features but also ensure a smoother and more efficient rendering process. Make it a habit to check for updates regularly, as this simple step can significantly improve the overall speed and stability of your Redshift rendering.
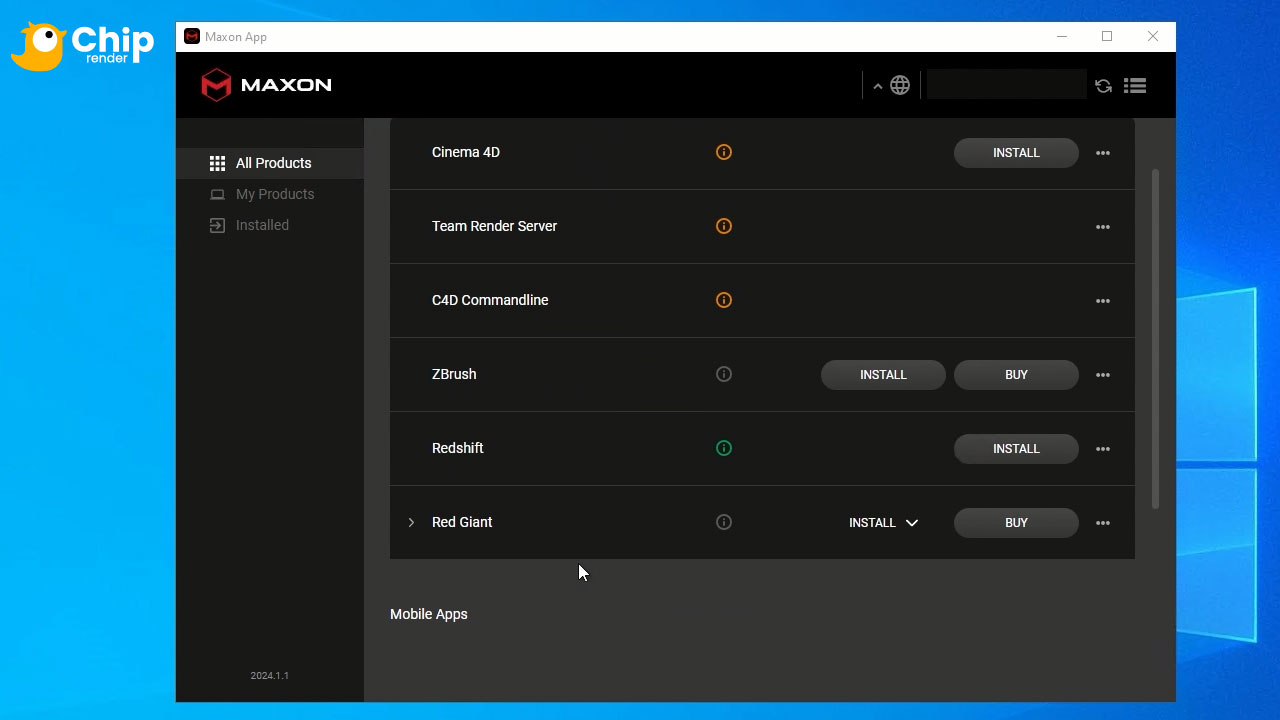
It is now very easy to update Cinema 4D and Redshift within one Maxon app. Plus, you can use the Nvidia GeForce Experience App to update your drivers.
Redshift Rendering Tip 2: Close unnecessary programs
While rendering, it is advisable to close any unnecessary programs running in the background. Resource-intensive applications can take up significant system resources, reducing the performance of both Cinema 4D and the Redshift renderer. By closing unused programs, you free up more RAM and processing power for your Redshift rendering tasks.
This simple but effective tip helps optimize your system resources, allowing Redshift to fully utilize your computer’s capabilities. Additionally, it minimizes the risk of potential conflicts or interruptions during the rendering process, resulting in a smoother and faster workflow.
Redshift Rendering Tip 3: Optimize your scenes
Scene optimization is essential for accelerating your rendering workflow. You can reduce unnecessary complexities of your scenes by:
- Minimize the number of polygons used.
- Cache, Bake or Convert Dynamics to Alembic.
- Do not use extremely high-resolution textures.
- Store all assets locally rather than on a server or in the Asset Database.
- Postpone Rendering of Clones and Displacement until render time in Redshift.
- Avoid resource-intensive features such as Motion Blur, Depth of Field, Displacement, Volumes, and Caustic effects as well as Materials with Transmission and Subsurface settings if possible.
By optimizing your Cinema 4D scenes, you not only improve rendering performance but also streamline the entire creative process, allowing Redshift to handle your projects with greater speed and efficiency.
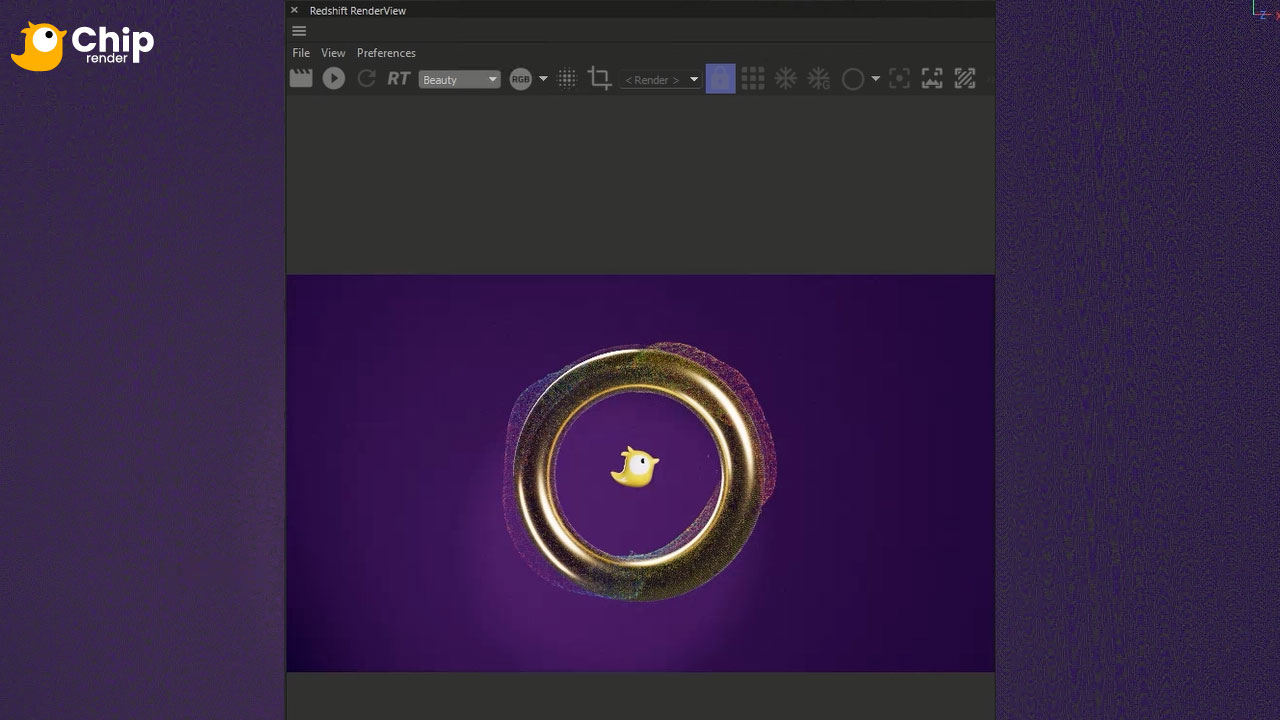
Redshift Rendering Tip 4: Use and Optimize Renderview
Leveraging the RenderView is very helpful when you want to achieve faster render times in Redshift for Cinema 4D. The Progressive renderer, rather than the IPR, should be your go-to tool for refining scenes before the final render. To enhance efficiency, explore features like the Render Region Tool, which allows you to focus on specific areas of interest, and use Freeze Tessellation and Geometry Updates judiciously. Additionally, consider rendering the smallest window possible by setting the scale to Fit Window. For smoother navigation within your scene, adjust the IPR Undersampling under ‘View’ to 5.
By maximizing the capabilities of the Redshift RenderView and incorporating these optimizations, you will not only streamline your workflow but also achieve accelerated rendering results.
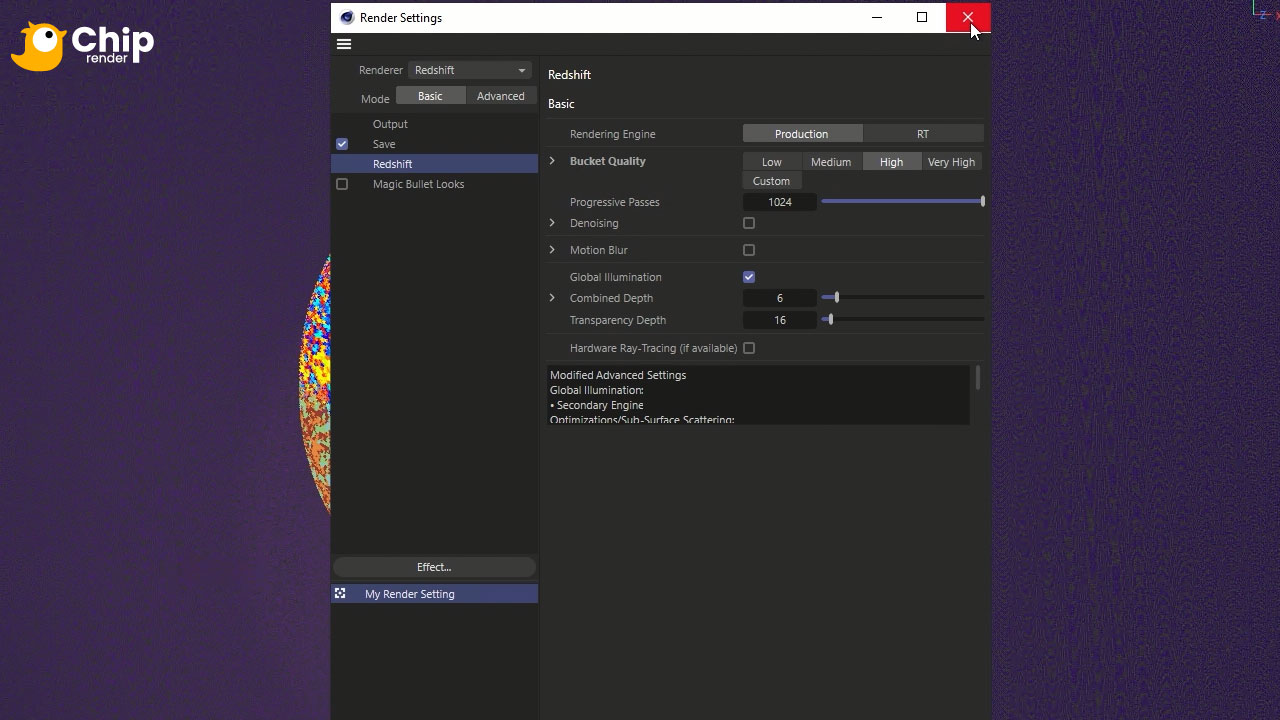
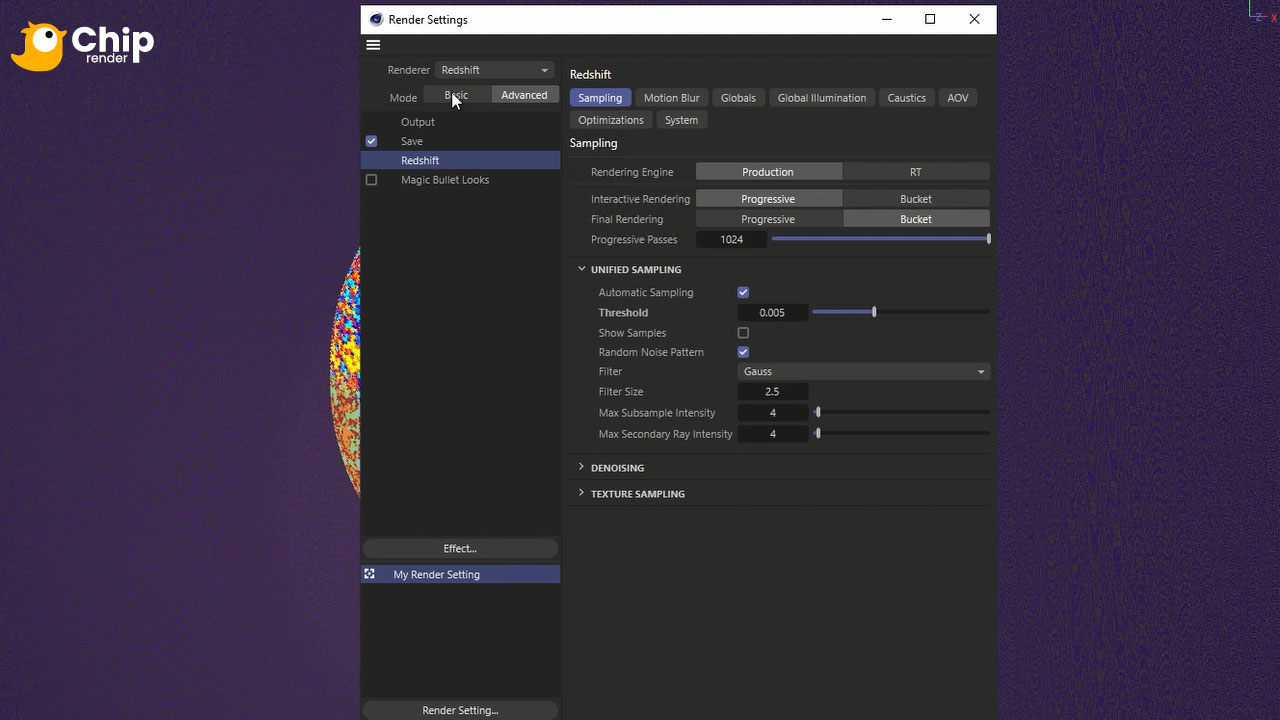
Redshift Rendering Tip 5: Reduce Progressive Passes
Another effective tip for speeding up your rendering process in Redshift for Cinema 4D is reducing the Progressive Passes. By reducing the Passes to 32 or even 16, you significantly accelerate the calculation time while freeing up valuable GPU resources for other tasks. While the lower sample count may bring some noise into the image, you can easily use denoising to clean up the preview.
This optimization not only speeds up your workflow but also offers a practical solution to achieve a faster render without compromising the overall quality of your final output.
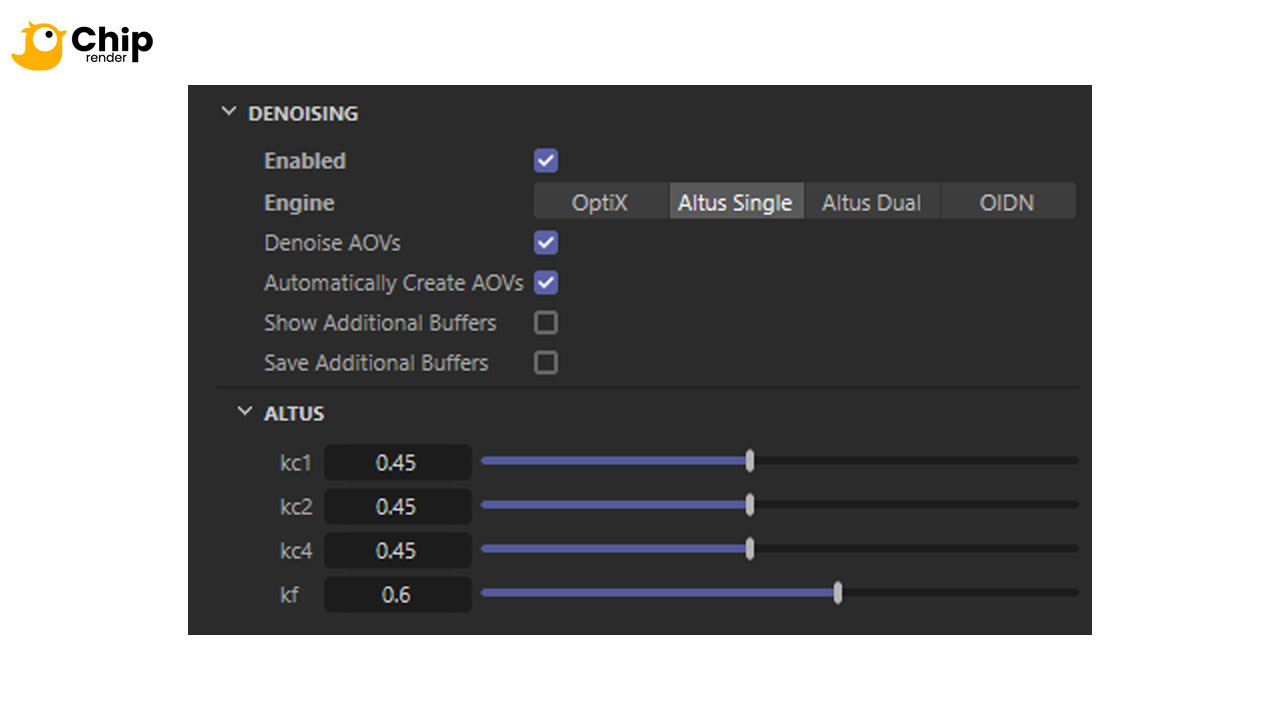
Redshift Rendering Tip 6: Denoise your image
With denoising in Redshift for Cinema 4D, you can enhance the visual quality of your renders while maintaining efficiency. Leveraging the OPTIX and OIDN denoising in Progressive mode effectively cleans up noise, resulting in a smoother and polished appearance. To further optimize your workflow, consider adjusting the Overhead setting to 0, which enables the denoising operation to take place after the render has fully completed. This is the fastest approach.
In Bucket mode, you can use all four denoising techniques. However, Altus Single and Dual stand out for their ability to retain intricate details but are slower to calculate.
To achieve a better-looking image, consider increasing the number of samples instead of denoising. While this may increase render time, we believe it is worth it.
Redshift Rendering Tip 7: Increase unified sampling value
For an accelerated preview experience in Bucket rendering mode, you can adjust the unified sampling value to 1 or above. This proves invaluable when fine-tuning materials and lighting, providing a more interactive rendering process. However, you need to revert the unified sampling value to 0.01 or lower before starting your final render. This eliminates any noise artifacts and delivers a crisp and refined image, striking the right balance between efficiency and the pursuit of visual excellence.
Extra Tip: Leverage Chip Render - a cloud render farm
In addition, improving Redshift rendering time goes beyond local optimizations. A great solution is to use a cloud render farm such as Chip Render and harness the power of cloud rendering.
Chip Render speeds up the rendering process, allowing you to offload the computational load to remote servers. This not only accelerates rendering times but also frees up your local machine for other tasks.
With Chip Render’s user-friendly interface and support, you can seamlessly integrate cloud rendering into your workflow, ensuring faster and more efficient Redshift rendering for your Cinema 4D projects.
 Join Chip Render Farm and cut your render times several times with just a small investment from $2.9. With Chip Render, you have your own Cloud Workstation and leverage 1/2/4 x GPU RTX 3090 servers for rendering Redshift projects.